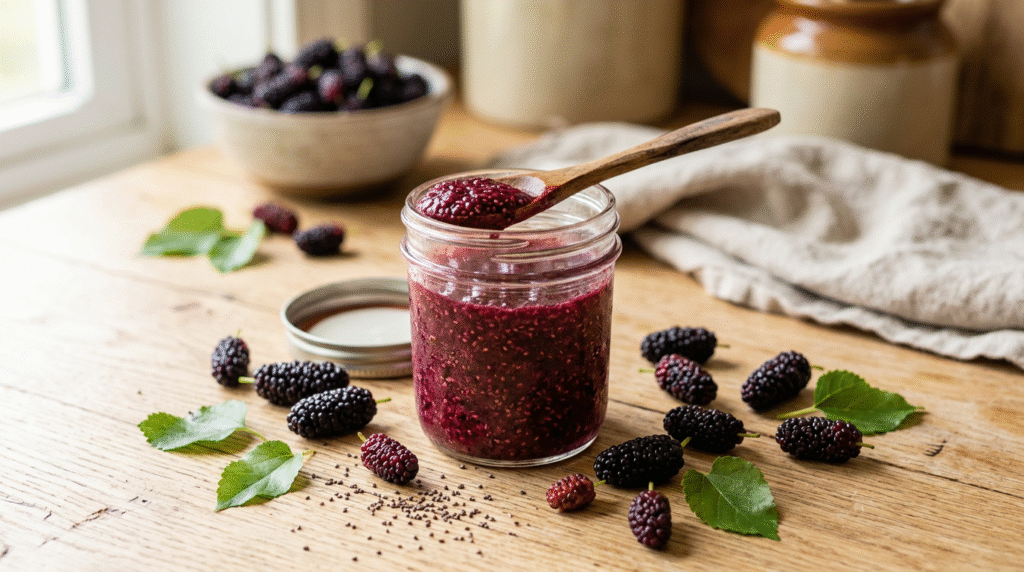
Imagine a spread so vibrant, so bursting with fresh fruit flavor, that it instantly elevates your morning toast or transforms a simple bowl of yogurt into a gourmet delight. That’s exactly what you get with this incredible Vegan Mulberry Chia Seed Jam. If you’ve ever been intimidated by traditional jam-making, with its precise pectin measurements and long simmering times, prepare to have your mind changed. This recipe simplifies the entire process, harnessing the natural gelling power of chia seeds to create a perfectly thick, luscious jam without any added pectin or excessive sugar.
Mulberries, often overlooked, are the star here, bringing a unique, subtly sweet, and slightly tart flavor profile that’s distinct from more common berries. Their delicate sweetness shines through, complemented by a hint of lemon that brightens every bite. Paired with the textural intrigue of tiny chia seeds, this jam offers a delightful mouthfeel – smooth yet with a pleasant, subtle pop. It’s a celebration of natural ingredients, free from refined sugars and artificial thickeners, making it a wholesome choice you can feel good about enjoying.
This jam isn’t just easy; it’s a revelation. It solves the problem of wanting homemade goodness without the kitchen marathon. In just a few simple steps, you’ll have a batch of this jewel-toned spread ready to adorn your favorite breakfast items, elevate your desserts, or even serve as a thoughtful homemade gift. Get ready to experience the pure, unadulterated taste of summer, captured in a jar, with a recipe that’s as rewarding to make as it is to savor.
Ingredients
- 2 cups fresh mulberries (about 250g), washed and stems removed
- 2 tablespoons chia seeds
- 2-3 tablespoons maple syrup (or agave nectar), adjust to taste
- 1 tablespoon fresh lemon juice
- 1/4 teaspoon vanilla extract (optional, enhances sweetness)
- Pinch of salt (optional, balances flavors)
Step-by-Step Instructions
- Prepare the Mulberries: In a medium saucepan, combine the washed mulberries, maple syrup, lemon juice, and a pinch of salt (if using).
- Simmer Gently: Place the saucepan over medium heat. Bring the mixture to a gentle simmer, stirring occasionally. As the mulberries heat up, they will start to release their juices and soften.
- Mash the Fruit: Once simmering, use a potato masher or the back of a spoon to gently mash the mulberries to your desired consistency. For a chunkier jam, mash less; for a smoother jam, mash more thoroughly. Continue to simmer for 5-7 minutes, allowing the fruit to break down and the mixture to thicken slightly.
- Stir in Chia Seeds: Remove the saucepan from the heat. Stir in the chia seeds and vanilla extract (if using) until well combined. The mixture will still be quite liquid at this stage.
- Thicken and Cool: Pour the jam into a clean jar or heat-proof container. Let it cool on the counter for about 15-20 minutes. As it cools, the chia seeds will absorb the liquid and cause the jam to thicken significantly.
- Chill and Serve: Once cooled to room temperature, cover the jar and transfer it to the refrigerator. Chill for at least 2 hours, or preferably overnight, to allow the jam to fully set and for the flavors to meld.
Pro Tips for Success
- Adjust Sweetness Carefully: Mulberries vary greatly in sweetness. Taste your mulberries before adding sweetener. Start with 2 tablespoons of maple syrup and add more only after simmering, once the fruit’s natural sweetness is fully expressed.
- Don’t Overcook: Unlike traditional jams, chia seed jam doesn’t require long cooking times to set. Simmer just long enough to soften the fruit and release juices (5-7 minutes). The chia seeds do the thickening, so overcooking can result in a less vibrant flavor.
- Customize Texture: For a jam with more whole fruit pieces, mash the mulberries lightly. If you prefer a smoother consistency, use an immersion blender directly in the pot for a few pulses, or mash more vigorously.
- Ensure Proper Setting: While the jam will thicken on the counter, the refrigerator is crucial for it to fully set. Don’t skip the chilling step; it allows the chia seeds to hydrate completely and achieve the perfect jam-like consistency.
Variations & Substitutions
- Other Berries: No mulberries? This recipe works beautifully with other berries like raspberries, blackberries, or even a mix of berries. Adjust sweetness as needed.
- Spice It Up: For a warm, aromatic twist, add a tiny pinch of ground cinnamon or a very small amount of grated fresh ginger during the simmering stage.
- Citrus Zest: Enhance the brightness by adding 1/2 teaspoon of lemon or orange zest along with the juice.
- Sweetener Swaps: Agave nectar or a granulated sugar alternative (like erythritol or stevia blend) can be used instead of maple syrup. If using granulated, ensure it dissolves completely.
- Higher Protein: While chia seeds already add protein, you could stir in a tablespoon of unflavored vegan protein powder (ensure it’s a type that mixes well without clumping) after the jam has cooled slightly, though this might alter texture.
Serving Suggestions
- Classic Toast & Scones: Spread generously on your favorite whole-grain toast, English muffins, or warm vegan scones.
- Yogurt & Oatmeal: Swirl into dairy-free yogurt, overnight oats, or a warm bowl of oatmeal for a burst of fruit flavor.
- Pancakes & Waffles: Drizzle over a stack of fluffy vegan pancakes or crispy waffles instead of traditional syrup.
- Dessert Topping: Use as a vibrant topping for dairy-free cheesecakes, ice cream, or even as a filling for thumbprint cookies.
- Peanut Butter & Jam: A timeless combination! Pair it with your favorite nut butter for a wholesome sandwich.
Storage & Reheating
- Refrigerator: Store the Vegan Mulberry Chia Seed Jam in an airtight jar in the refrigerator for up to 1-2 weeks. Ensure the jar is clean before filling.
- Freezer: For longer storage, you can freeze the jam. Transfer it to freezer-safe containers, leaving about an inch of headspace to allow for expansion. It will keep in the freezer for up to 3 months. Thaw overnight in the refrigerator before using.
- Reheating: This jam is typically enjoyed cold or at room temperature. If you prefer it slightly warm, you can gently heat a small portion in a microwave-safe bowl for a few seconds, stirring well.
Frequently Asked Questions
Q: Can I use frozen mulberries for this jam?
A: Yes, absolutely! If using frozen mulberries, there’s no need to thaw them first. Simply add them to the saucepan as directed. They may release more liquid, so you might need to simmer for an extra minute or two to reduce slightly before adding the chia seeds.
Q: Why isn’t my jam thickening?
A: The most common reason for a jam not thickening enough is insufficient chilling time. Chia seeds need time to fully hydrate and create their gel-like consistency. Ensure you’ve chilled the jam for at least 2 hours, or preferably overnight. If it’s still too thin after chilling, you can gently reheat it and stir in another 1/2 to 1 tablespoon of chia seeds, then chill again.
Q: Is this jam very sweet?
A: This recipe is designed to highlight the natural sweetness of mulberries with minimal added sugar. The amount of maple syrup is adjustable, allowing you to control the sweetness level to your preference. Mulberries themselves have a lovely, mild sweetness, so you might find you need less added sweetener than with other fruits.
Final Thoughts
This Vegan Mulberry Chia Seed Jam is more than just a spread; it’s a testament to how simple, wholesome ingredients can create something truly extraordinary. With its vibrant color, delightful texture, and the unique, sweet-tart flavor of mulberries, it’s destined to become a staple in your kitchen. Whether you’re slathering it on toast, swirling it into your morning oats, or using it to elevate a dessert, each spoonful is a taste of pure, unadulterated joy. Don’t wait – embrace the ease and deliciousness of homemade jam today!